Shoulder Dislocation (Anterior & Posterior): Symptoms, Red Flags, Treatment, and Rehab Roadmap
This article explains what to do after a shoulder dislocation, including key symptoms, medical evaluation, treatment options, and a practical rehabilitation roadmap—written for both athletes and the general active population.
The shoulder is structurally one of the joints most prone to dislocation [1]. Because recurrence (re-dislocation / recurrent instability) can occur, early assessment, an appropriate treatment plan, and stage-based rehabilitation matter.
- What a shoulder dislocation is (anterior vs posterior) and common injury patterns
- Typical symptoms, common associated issues (including nerve symptoms), and red flags
- Clinic imaging (X-ray / CT / MRI) and how treatment decisions are made
- Rehab flow for non-operative vs surgical care (stage-based timelines)
- Return-to-sport benchmarks and key checkpoints before full return
目次
- 1 What Is a Shoulder Dislocation?
- 2 Common Situations That Cause Shoulder Dislocation
- 3 Common Symptoms of Shoulder Dislocation
- 4 Red Flags: When to Seek Medical Evaluation Urgently
- 5 What to Check On the Field or at Home (Safety-Focused)
- 6 Exams and Imaging in the Clinic
- 7 If You’re Diagnosed With Shoulder Dislocation: Treatment Decisions
- 8 Rehabilitation After Shoulder Dislocation
- 9 Return-to-Sport: How to Think About Timing
- 10 FAQ
- 11 Summary
- 12 References
What Is a Shoulder Dislocation?
The shoulder joint (the glenohumeral joint) is formed by the glenoid of the scapula and the humeral head. A shoulder dislocation occurs when the humeral head moves out of the glenoid socket (Figure 1).
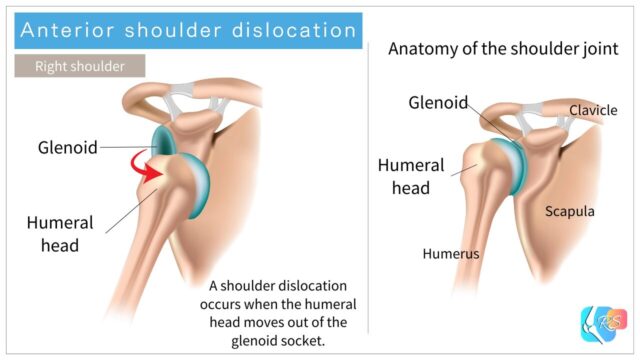
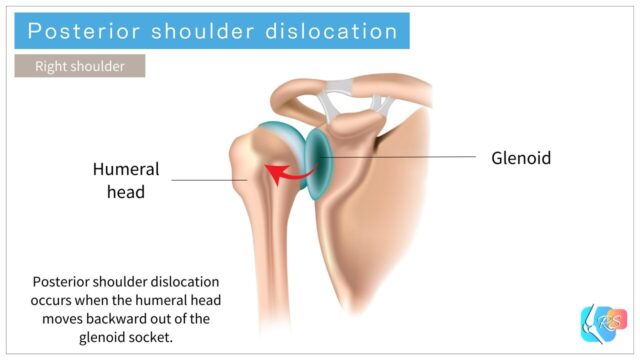
There are several directions of dislocation, but anterior dislocation is the most common. Posterior dislocation (Figure 2) is less common [2].
With anterior dislocation, structures that stabilize the front of the shoulder (labrum, capsule, and ligaments) may be injured. A classic example is a Bankart lesion (labral injury), and a compression defect on the posterolateral humeral head is called a Hill-Sachs lesion (Figure 3).

When these stabilizing structures are damaged, the risk of recurrence (re-dislocation / recurrent instability) can increase. Long-term follow-up studies report that even after a first-time anterior dislocation treated non-operatively, a certain proportion of people experience recurrence [3].
Systematic reviews also suggest that recurrence risk may relate to factors such as younger age, sports participation, and joint laxity (hypermobility) [4]. In younger competitive athletes, recurrence risk tends to be higher, so it’s practical to discuss the plan with a specialist—considering return-to-sport timing and how much recurrence risk is acceptable in your sport role and season context [4,5].

Common Situations That Cause Shoulder Dislocation
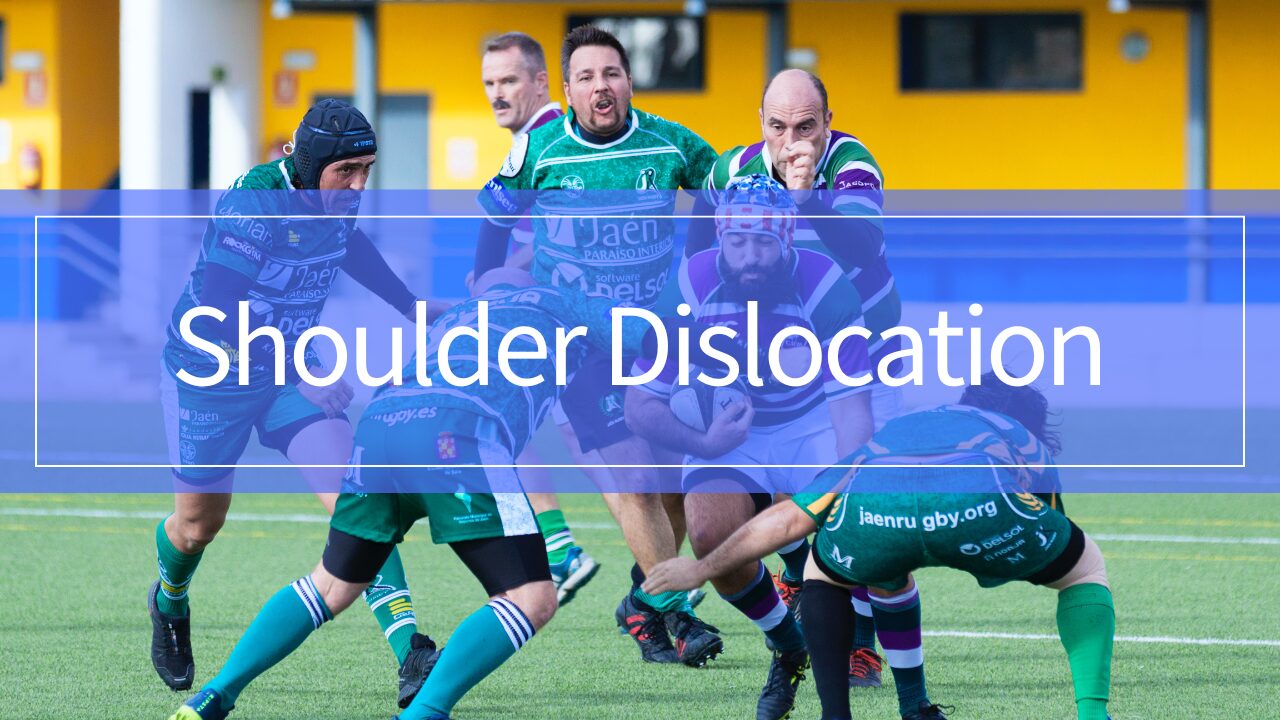
Shoulder dislocation is more likely in contact sports and sports that involve falls [1].
- Rugby / American football: tackles and direct contact
- Soccer / skiing (and similar): falls with an outstretched arm
- Baseball: head-first sliding and collisions

Common Symptoms of Shoulder Dislocation
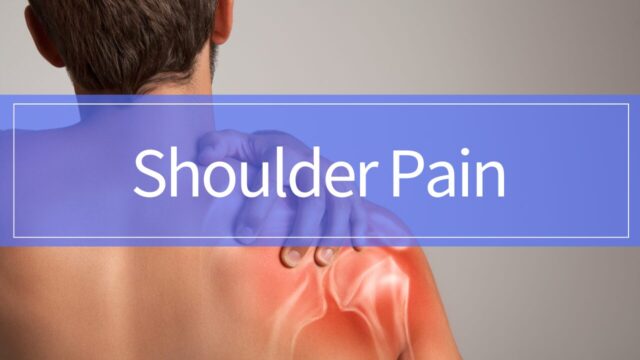
Many people notice severe shoulder pain and a strong sensation that the shoulder has “come out.” Right after dislocation, the arm may feel weak and people often support the injured arm with the other hand (Figure 5).
Dislocation can also be associated with numbness, reduced sensation, or weakness (for example, symptoms related to the axillary nerve region). These findings should be taken seriously.


Red Flags: When to Seek Medical Evaluation Urgently
If you suspect the shoulder has come out, evaluation by a medical professional is generally recommended. In particular, consider same-day assessment (urgent care / emergency department / orthopedic or sports medicine clinician) if any of the following apply:
- Strong numbness, major sensory loss, or difficulty moving the fingers/hand
- Severe deformity, rapidly increasing swelling, skin color changes, or the arm/hand feels unusually cold
- The shoulder “seems back in,” but pain remains severe or there is strong apprehension that it will slip out again
- A clear fall/collision where a fracture cannot be ruled out
Trying to force the shoulder back in on your own can be risky—especially if a fracture, nerve injury, or vascular injury is present. In general, it’s safer to avoid self-reduction and seek evaluation by a trained provider.
This article is for education and does not replace individualized medical diagnosis or treatment.
If symptoms are severe, worsening, associated with numbness/weakness, significant swelling, color/temperature changes, or follow major trauma, seek medical evaluation promptly.
What to Check On the Field or at Home (Safety-Focused)
Confirming a dislocation requires imaging. On the field or at home, the most practical goal is not diagnosis—it’s checking for danger signs and protecting the shoulder until medical evaluation.
- Fingertip sensation (is there a major left-right difference?)
- Ability to move fingers and elbow (is there marked weakness?)
- Without forcing painful movement: does supporting the arm in front of the body reduce discomfort?
If you think it may be dislocated, a safer flow is: support the arm (sling position), use cooling if it helps, and seek medical evaluation.
Exams and Imaging in the Clinic
Imaging commonly includes X-ray, CT, and MRI.
X-ray: Checks dislocation direction and rules out fractures or bony findings such as Hill-Sachs lesions.
CT: More detailed evaluation of glenoid bone loss (for example, a bony Bankart lesion).
MRI: Evaluates soft tissues such as the labrum (Bankart lesion), capsule/ligaments, and—when suspected—rotator cuff pathology.
Clinical assessment typically includes history, palpation, range-of-motion and stability tests, and maneuvers such as the apprehension test and relocation test as needed.

If You’re Diagnosed With Shoulder Dislocation: Treatment Decisions
Broadly, treatment choices include non-operative (conservative) care and surgical care.
After a first-time dislocation, non-operative care is often selected. However, depending on age, sport level, time-to-return needs, extent of bone loss, and recurrence risk, some cases consider surgery earlier [4,5].
If dislocation recurs or bone injury is substantial, surgical treatment may become more strongly indicated.
Below, we first explain the rehab flow for non-operative care, then outline common surgical procedures and typical post-operative rehab benchmarks.
Rehabilitation After Shoulder Dislocation
Non-Operative Rehabilitation
This section explains a typical rehab flow when aiming to return after a first-time dislocation treated non-operatively.
Immobilization (Injury to ~3 Weeks)
After a shoulder dislocation, there is often a period of immobilization (commonly around ~3 weeks, depending on the case).
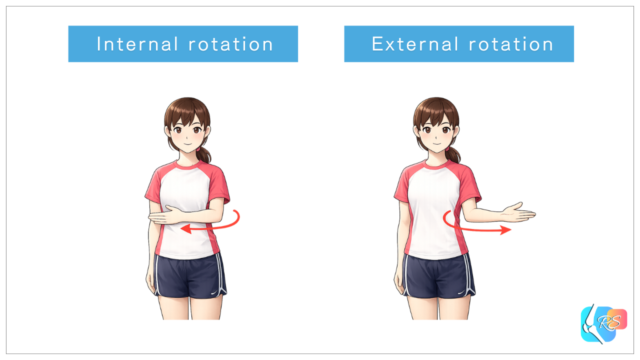
Immobilization may be done in internal rotation or external rotation. A meta-analysis suggests external rotation immobilization may reduce recurrence risk compared with internal rotation in some contexts [6]. However, comfort, daily-life practicality, and brace tolerance also matter—so it’s best to follow the treating clinician’s plan.
• Gentle massage for upper arm and neck muscles (within comfort)
Early Rehab (3–6 Weeks)
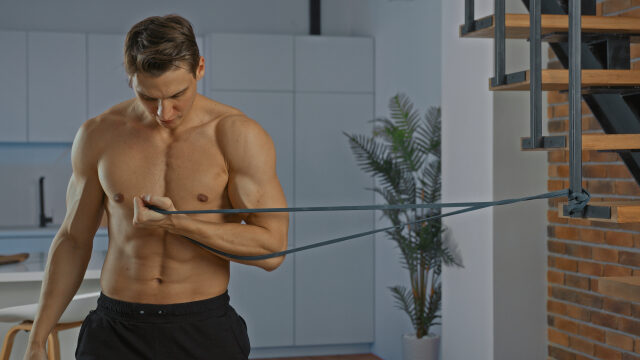
• Strengthen rotator cuff (“inner” shoulder muscles)
• Strengthen scapular stabilizers
Mid Rehab (4–8 Weeks)
• Rotator cuff training with greater shoulder range (progressed carefully)
• Begin running with arm swing (as tolerated)
Late Rehab (6–12 Weeks)
• Reaction drills and partner-based movement drills (sport-specific progression)
• Minimal apprehension during sport-specific movements
Return Phase (8–16 Weeks)

Surgical Rehabilitation
In recurrent dislocation or cases with substantial bone loss, surgery may be indicated [5].
There are several surgical options. Below are representative examples, but the best choice depends on imaging findings, sport demands, recurrence risk, and desired return timing.
- Bankart repair
- Repairs injured labrum/capsule (Bankart lesion) to restore stability.
- May be considered in athletes who want to preserve motion as much as possible (for example, the throwing shoulder in baseball), depending on the overall instability pattern.
- Coracoid transfer procedures (Bristow / Latarjet)
- Transfers the coracoid process with attached soft tissues to the anterior glenoid and fixes it with screws to improve stability.
- Often used when there is meaningful bone loss or high recurrence risk, aiming for stronger anterior stability.
- Range-of-motion trade-offs and complication risks are also discussed in the literature, so it should be chosen carefully.
These are simplified summaries. Procedure selection should be made with an orthopedic specialist based on bone loss, instability pattern, sport, position, and timing goals.
Rehab After Bankart Repair (Typical Benchmarks)
The following is a general guide. Post-operative progression should follow the surgeon and therapist’s protocol first.
• Begin supported rotator cuff activation as tolerated without increasing inflammation
• Soft-tissue work for upper arm and neck muscles
• Progress from active motion to rotator cuff strengthening
• Begin walking / light jogging
From there, training volume and intensity are increased gradually. A commonly cited general return window is around 4–6 months, though timing varies by sport and individual status.

Rehab After Bristow / Latarjet (Typical Benchmarks)
The following is a general guide. Post-operative progression should follow the surgeon and therapist’s protocol first.
• Begin supported rotator cuff activation as tolerated without increasing inflammation
• Soft-tissue work for upper arm and neck muscles
• Progress from active motion to rotator cuff strengthening
• Begin walking / light jogging
• Begin weight-bearing progressions (quadruped, plank, push-up progressions)
• Gradually progress resistance training as cleared
• Begin contact drills (as cleared)
From there, training volume and intensity are increased gradually. A general return window is often cited around 3–6 months, depending on bone healing, functional testing, and sport demands.
In some sport contexts, earlier return may be discussed—but the final decision should be based on healing status and objective functional assessment.
Return-to-Sport: How to Think About Timing
Return timing varies widely depending on sport, position, recurrence risk, pain, range of motion, strength, and apprehension. Reviews note that while some athletes return relatively quickly, recurrence risk can remain a concern in high-risk sports [7].
As a safer baseline, decisions are best guided by function rather than the calendar—such as controlled pain, near-symmetrical ROM and strength, and low apprehension during sport-specific actions. When possible, using objective testing and functional benchmarks with a clinician can make the process safer and clearer.
FAQ
Q1. Can I put it back in place on the field?
In general, attempting reduction on your own is not recommended. A fracture can be present, and nerve or vascular injury must be considered. It is safer to be evaluated first and have reduction performed by a trained provider in an appropriate setting.
Q2. If it “slipped out and went back,” do I still need evaluation?
Even if it felt like it returned, structures such as the labrum can still be injured, and instability can remain. Consider evaluation if pain persists, apprehension remains, or there are neurological symptoms (numbness/tingling/weakness).
Q3. Who is more likely to experience recurrence?
Systematic reviews suggest factors such as younger age, sex, joint laxity, and the presence of fractures may be associated with recurrence risk [4]. In athletes, sport demands and exposure also matter, so an individualized assessment is usually the most practical approach.
Q4. Is external rotation immobilization always better?
A meta-analysis suggests external rotation immobilization may reduce recurrence risk compared with internal rotation in some contexts [6]. However, real-world factors (comfort, brace tolerance, daily-life practicality) influence the choice, so it should be decided with your clinician.
Q5. When can I start strength training or contact drills?
Timing depends on healing and symptoms, but the general principle is staged progression (early → mid → late → return phase). If pain or apprehension increases, it can be appropriate to reduce load and step back temporarily.
Summary
Shoulder dislocation is not only about getting the joint reduced—it often becomes about how to reduce recurrence risk and rebuild stable shoulder function [3,4].
Treatment decisions (non-operative vs surgical) depend on age, sport level, bone loss, recurrence risk, and return timing goals. Working with a specialist and progressing through stage-based rehab can support a safer, more confident return.